Student Discount for WooCommerce Setup instructions
August 2024
Please follow these instructions in their entirety and in sequence during your initial install and set up. If you need support, please contact us.
Overview
Student Discount for WooCommerce is powered by InAcademia and brings you all the advantages of offering discounts to the student community without the challenges. Our simple plugin is the real-time, digital equivalent of asking a student to show you their university or student card. It allows you to instantly validate at the shopping cart if a customer is a student* without the need for collecting any additional data or waiting for inefficient offline processes such as document verification.
The whole validation process takes seconds and is based on the trusted eduGAIN academic federated identity infrastructure.
*at institutions that have joined an academic identity federation that is a member of the eduGAIN interfederation. (see www.edugain.org)
This plugin was funded by the European Commission and developed by a community of national academic identity federation operators.
By choosing to use this plugin, you will be helping to support the development and operation of not-for-profit academic network and identity solutions.
Setting up ‘Student Discount for WooCommerce’
Step 1 – Specify your discount code
Pre-requisites:
1. WooCommerce Instance created with products.
2. WooCommerce Coupons Feature enabled
The Student Discount for WooCommerce shopping cart extension works in combination with the WooCommerce Marketing capability, using the standard WooCommerce Coupons feature. Here you should specify the type of discount that you wish to offer.
After enabling the coupons feature in the WooCommerce Settings, hit ‘Add new coupon’, add a name and description and specify the discount type (e.g. fixed or percentage), amount and expiry date ( if applicable). The Coupons feature has a number of granular settings that can help you to correctly define any coupon restrictions or usage limits, including minimum spend and the ability to include or exclude specified products. You can find more information about WooCommerce coupon configuration and management here: https://woo.com/document/coupon-management/.
The following behaviours are supported:
Supported coupon rules
| Shopping cart contents | Coupon rules relating to specific products | Button/Notice behaviour* |
|---|---|---|
| Single or multiple products | All products ‘not excluded’ in the student discount coupon config | Button/Notice are present on the shopping cart, the validation roundtrip can be performed and the discount is applied to all products in the cart. |
| Single or multiple products | All products ‘included’ in the student discount coupon config | Button/Notice are present on the shopping cart, the validation roundtrip can be performed and the discount is applied to all products in the cart. |
| Two or more products | At least one product ‘not excluded’ and at least one product is ‘excluded’ in the student discount coupon config | Button/Notice are present on the shopping cart, validation roundtrip can performed and the discount is applied to only the product that is ‘not excluded’ in the coupon’s config. |
| Two or more products | At least one product ‘included’ and at least one product is ‘not included’ in the student discount coupon config | Button/Notice are present on the shopping cart, validation roundtrip can be performed and the discount is applied only to the product that is ‘included’ in the coupon’s config. |
| Single product | Where the product is ‘included’ in the student discount coupon config | Button/Notice are present, the validation roundtrip can be performed and discount cannot be applied. |
| Single product | Where the product is ‘excluded’ in the student discount coupon config | Neither Button/Notice are present, the validation roundtrip cannot be performed and the discount cannot be applied. |
*as specified when choosing either Button, Notice or both.
If any required products are configured, a check is performed to determine whether any of the products present in the cart are configured to carry the student discount. If no required products are configured to specifically to carry the discount, and if there are only excluded products in cart, the Button/Notice is not applied..
Note that users cannot add a ‘not excluded from coupon’ product alongside ‘excluded from coupon’ product in order to validate for the offer, and then remove the product that’s excluded from the offer. In this scenario, the discount/coupon is removed.
Once you have a discount code created record this as it will be needed in the next steps.
Step 2 – Download and activate the plugin
Pre-requisites:
1.	Unique Discount Code for student discounts (see Step 1)
2.	Student Discount for WooCommerce installed at your WordPress instance
If you haven’t already done so, please visit the WooCommerce store and install the Student Discount for WooCommerce Plugin.
Note: This plugin requires an active service subscription to access the API that provides the validation of “student-ness” of users. Unfortunately, if you’d prefer not to subscribe, you are not permitted to apply either the button or the notice to your shopping cart. We offer a 14-day trial that will allow time for you to test and become comfortable with the look and feel of the shopping cart extension, even to launch to production where you can observe users interacting with it.
Step 3 will explain how to set up an InAcademia Service Subscription; but please continue to follow these instructions in the correct sequence.
Downloading the plugin will add it to the list of ‘Installed Plugins’ on your WordPress Admin Plugins menu.
Activate the plugin from the Plugins menu of your WordPress UI. It’s recommended that you initially install it to a development, testing or staging environment before proceeding to the production environment.
Configure the plugin’s settings

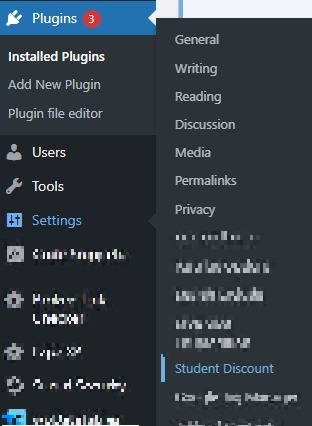
You can access the plugin’s settings from either the Plugins menu of your WordPress Admin Dashboard (see fig 1) or from the WordPress sidebar menu (see fig 2).
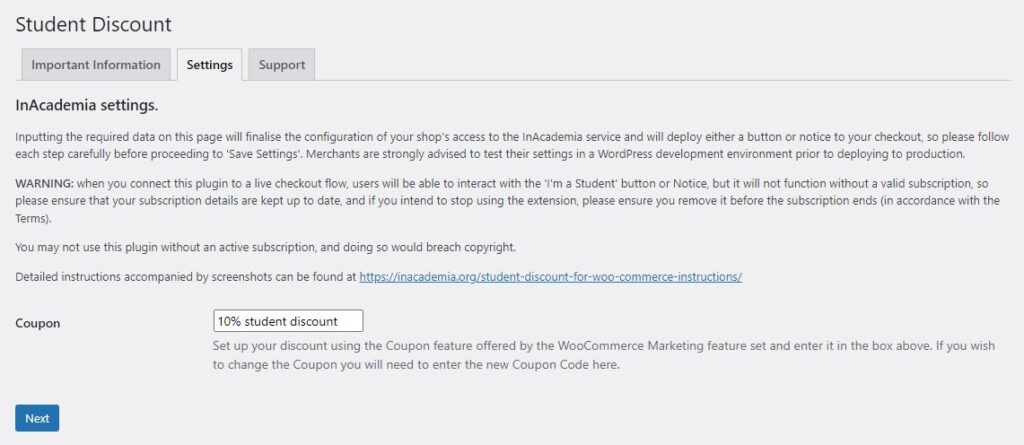
Please read the ‘Important Information’ screen, which provides context to the setup of the plugin. Support can be accessed via the ‘Support’ tab.
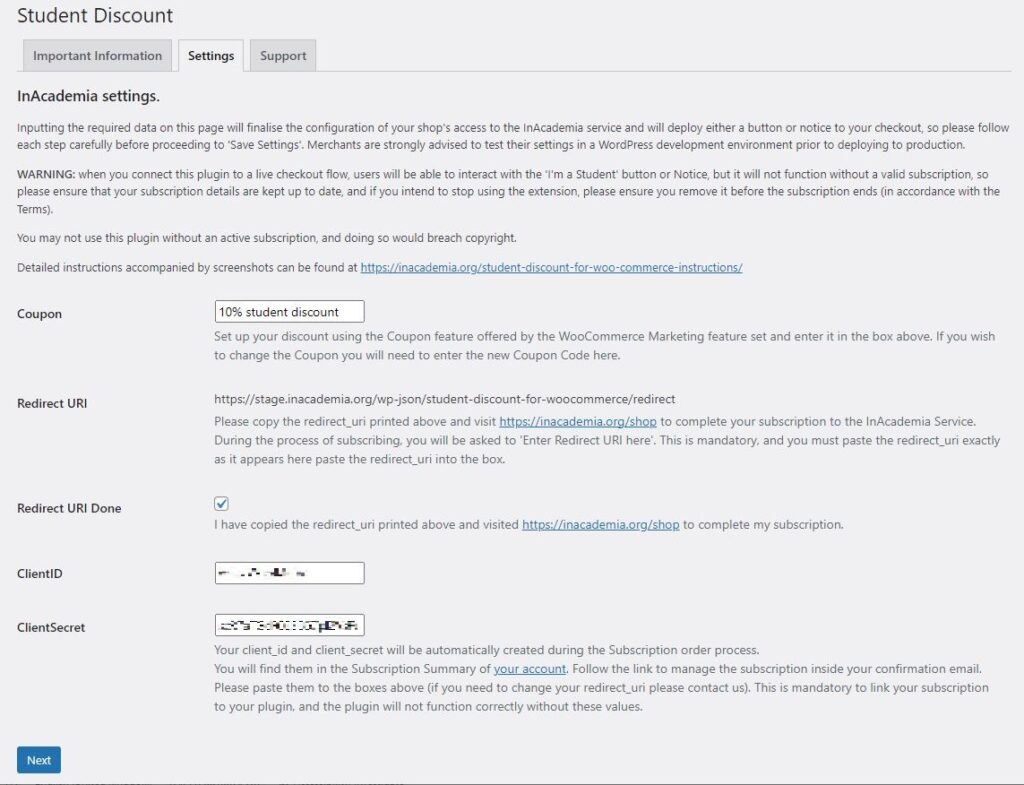
Select the ‘Settings’ tab.
It is important to follow the instructions in order for the extension to be configured correctly.
It is necessary to link your subscription with the plugin in two stages before the InAcademia button will be available for users to interact with.
The following steps explain how to do it; please do not deviate from the instructions.
Enter your coupon code
Type the name of a coupon that you created previously into the box titled ‘Coupon’, and hit ‘Next’.
Note: Currently, the Student Discount for WooCommerce plugin only supports utilisation of one discount at a time, but if support for multiple discounts is of interest, please contact us via the ‘Support’ tab, describing your proposed use case.
Set up your subscription and make it unique to the plugin in your shop
Hitting ‘Next’ after inserting your coupon name will calculate a unique Redirect URI. The InAcademia API will redirect to this URI after completing the validation of the user’s “student-ness”, returning the user to your shop to complete the checkout process.
The plugin calculates the Redirect URI from the defined structure for WordPress URLs, i.e. https://siteURL/wp-json/student-discount-for-woocommerce/redirect
You will need to provide this unique Redirect URI during the process of subscribing to the API, so please select the whole URI value and CTRL+C before navigating away from the page.
Step 3 – Subscribing to the InAcademia Service
Pre-requisites:
1.	Redirect URI copied from Step 2
Visit inacademia.org/shop in a new tab or window to complete your subscription to the InAcademia Service in order to link your plugin installation to your subscription, and to receive a unique client id and client secret.
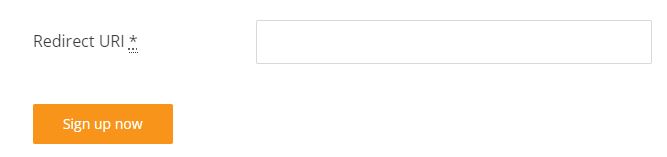
Select the required subscription product, hit ‘Sign Up Now’.
The next screen requests a mandatory Redirect URI, and you must paste the redirect_uri exactly as it appears on the plugin settings into the box.
When you have completed the payment process, you will receive confirmation of your order (note that the total paid will be €0.00 to access the trial period):
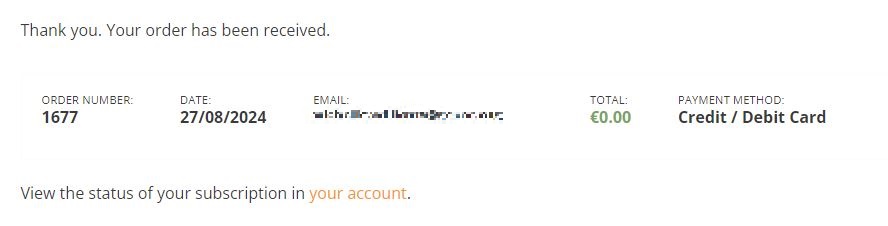
The price of the ongoing subscription (either including or excluding VAT depending on your location in Europe) is also confirmed on the order confirmation screen:

Link your subscription to the plugin
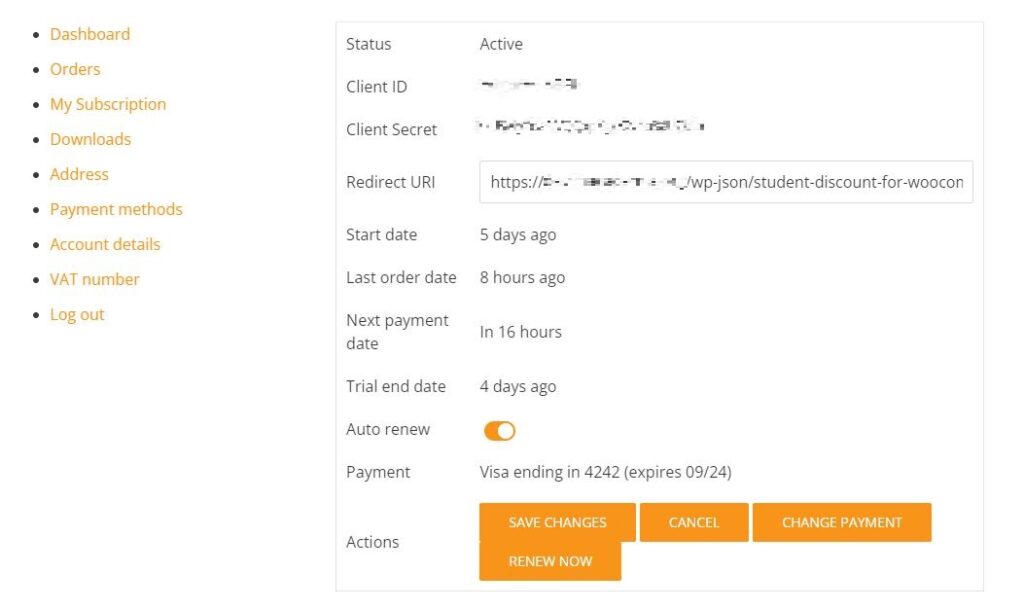
Your client_id and client_secret will be automatically created during the Subscription order process. You will find them in the Subscription Details of the ‘My Account’ section of your InAcademia.org shop account (please refer to your subscription confirmation for a link to your account).
You will need both the client id and the client secret to complete the set up of your plugin.
For future reference, you will be able to find your client id and secret as follows:
- View the status of your subscription in your account (hit ‘your account’).
- Hit ‘Subscriptions’ or ‘My Subscription’
You will also be able to reach your account from the hyperlink in the email confirmation that you received when you subscribed to the product. If you did not receive the email, please check your spam folder.
As well as finding your unique Client ID and Client Secret on this page; you will also be able to manage your subscription, payment and autorenewal settings here. Both Client ID and Client Secret are vital terms required for the proper functioning of the service. They will be transmitted to the InAcademia API with each user’s validation request. Without these values, users will be redirected to an error page.
Copy the Client ID and Client Secret values from your subscription confirmation.
Please note that the Redirect URI field is editable in ‘My Account’: this edit function is only to be used in the event that the plugin is installed with a fresh Redirect URI at a later stage, and the shop owner wants to continue using the same subscription. Do not edit the Redirect URI field in any other circumstance, and if you do decide to edit it, please send a support request to notify the support team that the Redirect URI has been updated.
Return to the plugin Settings.
Firstly, check the ‘Redirect URI Done’ box, and hit ‘Next’.
You will then be invited to enter your unique Client ID and Client Secret values here. Paste them to the related boxes in exactly the same way as provided, and hit ‘Next’.
Step 4 – Activate your service
Once you have created your discount coupon, linked your Redirect URI to your subscription, and linked the Client ID and Client Secret to the plugin, you will need to decide how you would like to invite users to validate their academic affiliation, either by using a Notice URL or by hitting the ‘I’m a Student’ button.
It’s allowable to use either the Button or the Notice, or both at the same time, but please be aware that whatever your choice, if you check either box (or both boxes), either the ‘I’m a Student’ button or ‘notice’ (or both) will be enabled on your shopping cart as soon as you hit ‘Save Settings’.
If you ‘Save Settings’ with either of the two ‘Publish’ options checked, this will deploy the extension to your shopping cart immediately, so please ensure that 1) you’re ready to publish the new feature, and 2) your subscription is complete and active before saving the settings, in order to avoid your users experiencing redirect errors.
It may take up to 15 minutes for the relationship between Redirect URI and Client ID/Secret to take effect at the InAcademia ser, during which time it will not be possible to complete a validation roundtrip.
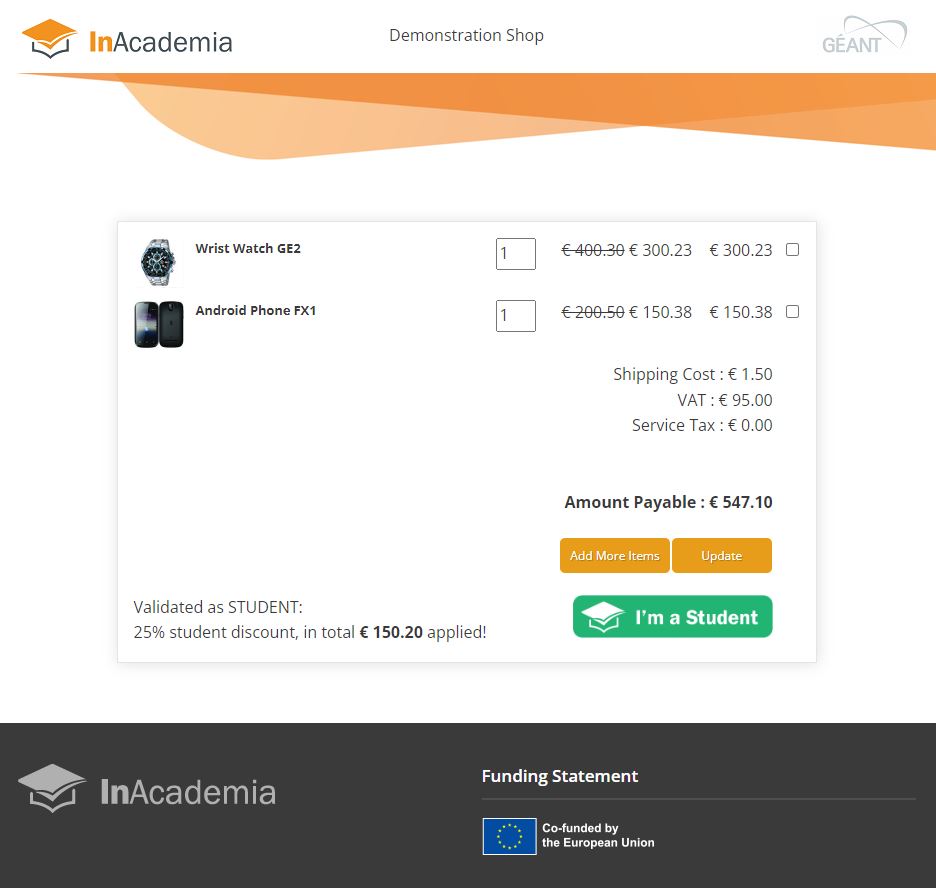
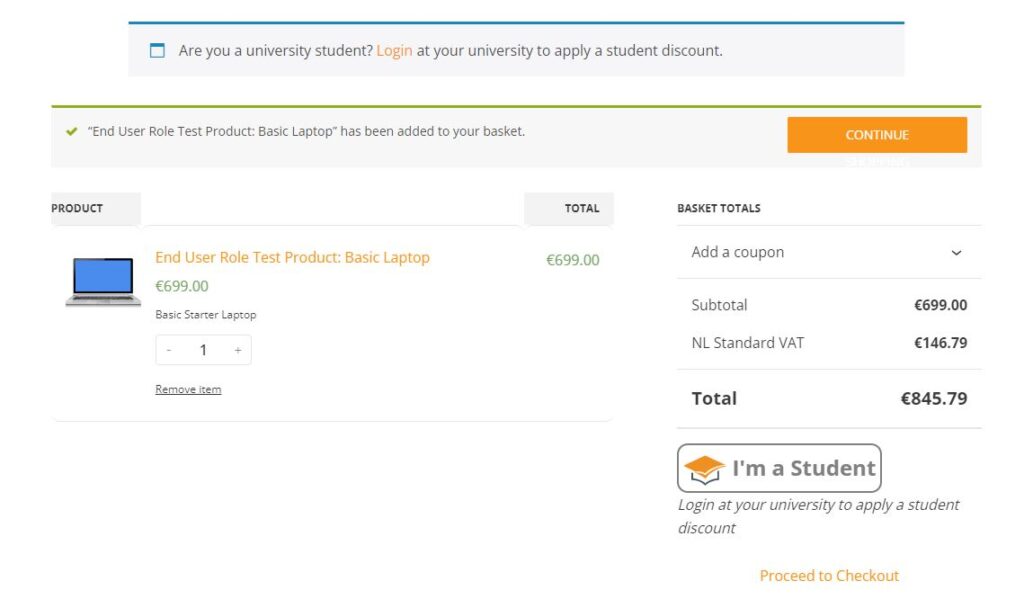
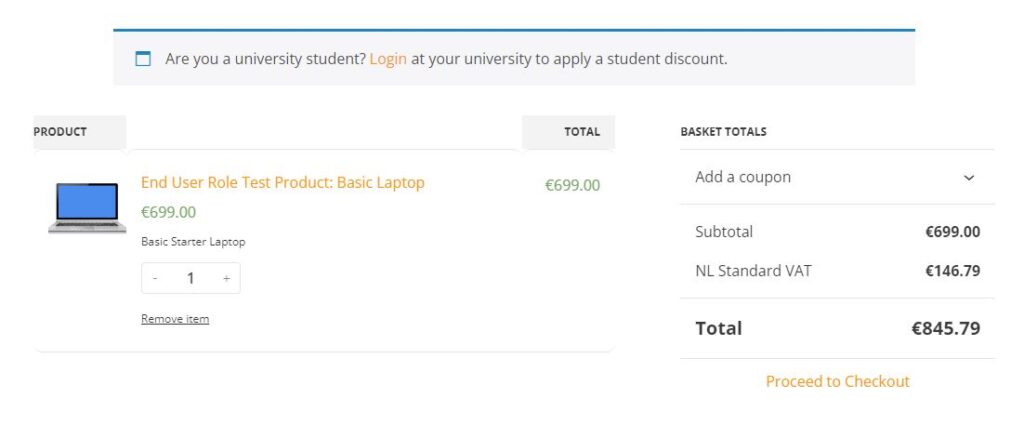
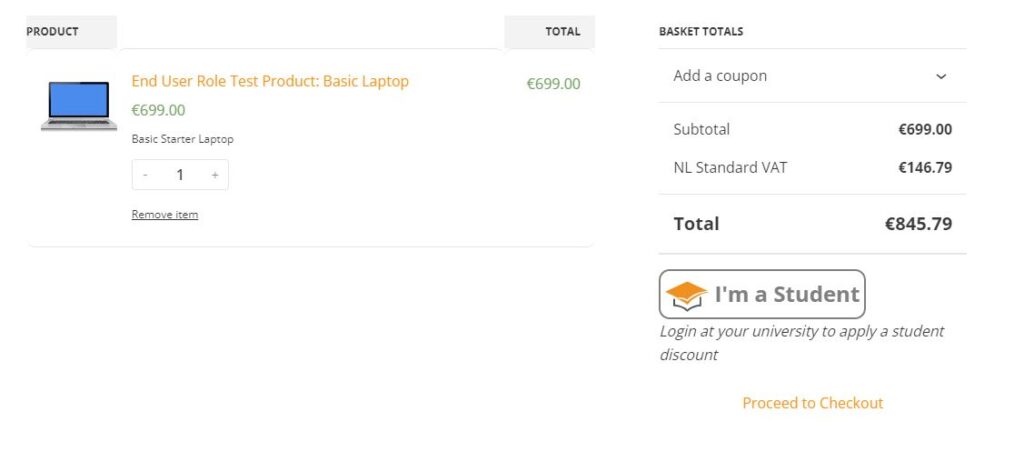
Refer to the screenshots below for examples of how the Notice and Button options appear on your shopping cart.
Notice: checking this box means that users will be prompted to click a URL with a pre-configured message that invites them to get a discount by logging in at their university. Hitting that link will initiate a call to the API, and the user will be invited to select their institution from a discovery service (a list of institutions that are in scope for the validation service), and will be prompted to log in at their institution. Successful login, and release of the ‘student’ attribute will return the user to the shopping cart page, and the discount as specified by the coupon will be applied to the total.
Button: checking this box means that users will see an ‘I’m A Student’ button on the shopping cart; hitting that button will initiate a call to the API, and the user will be invited to select their institution from a discovery service (a list of institutions that are in scope for the validation service), and will be prompted to log in at their institution. Successful login, and release of the ‘student’ attribute will return the user to the shopping cart page, and the discount as specified by the coupon will be applied to the total.
With both ‘Notice’ and ‘Button’ activated:
With only ‘Notice’ activated:
With only ‘Button’ activated:
Removing the extension from your shopping cart
You are not permitted to continue publishing the Notice or the Button on your shopping cart if you do not have an active subscription. Therefore, if you choose not to proceed after the trial period of evaluating our plugin, you must:
- Leave ‘Notice’ and ‘Button’ checkboxes unchecked (and save settings).
- ‘Deactivate’ the plugin in the WordPress Plugins UI.
Continued publication of the ‘Notice’ and ‘Button’ without an active subscription will constitute copyright infringement.
Check out our FAQs!
You can find out more about the plugin here: https://inacademia.org/faqs/#student-discount-for-woocommerce
We also publish a general set of FAQs that will help to answer any questions you might have about the InAcademia service and how it works.